Creating Emotions

In creative media we have been experimenting with emotions using liquefy. I chose to alter and manipulate the neutral features of Megan Fox to create emotions.


In this image I have made Megan's features happier, by using the forward warp tool to raise her eyebrow and her cheeks, as well as using it to stretch out the mouth and angle it upwards. To make her eyes bigger I used the bloat tool. Then, as a final touch, I increase the saturation to give her that happy, healthy glow.


In this image I have made Megan Fox's features look sad, by using the forward warp tool to lower her eyebrows, particularly at the end, to lower her cheeks, and to angle her mouth downwards. I also used the pucker tool to make her top lip smaller, and then the bloat tool to make her bottom lip fuller, so that it gives the impression of a pout. To make her eyes bigger I again used the bloat tool, and then as a final touch, decreased the saturation of the image so that she looks glum and gloomy.
In this image I altered Megan Fox's features to look like a bunny rabbit. Not really. As I could not successfully transform Megan's face into another emotion, I used the rabbit image pictured below. This time I altered the bunny's features to make it look angry, by using the pucker tool to decrease the size of the eyes so that it appeared to be squinting, and then the size of its mouth, as if it was pursing its lips. I also used the forward warp tool to move the eyes closer together and to slightly alter the mouth/nose.
http://lh3.ggpht.com/_woGKt1wUuyE/SrzJcgggZYI/AAAAAAAAAxI/mo39QhSVtY0/rabbit.jpg
Read more

Emotions

Here are some emotions:

http-_wowjava.files.wordpress.com_2010_04_crying_baby.jpg

https://blogger.googleusercontent.com/img/b/R29vZ2xl/AVvXsEjgmMFu-C0P0fyd8r56gMYMzpoq0oAMo8h6xRVdQwrM8NUsYC9SS69rLnhwMjxBgGQgY9vReGZyMn2VKSElHOG9WNyGwt349MValgIO1NHuD4knd9LXzGNYxPWTPJJXQBKUIf1jInriN5Q/s1600/X+Factor+2010+Flaky+Katie+Waissel+survives+by+the+skin+of+her+teeth+as+Simon+Cowell+is+down+to+one+act+after+Belle+Amie+are+voted+off+20.jpg

http://farm4.static.flickr.com/3297/3414415655_862bc0ce97_o.jpg

Upset - Where ones brow furrows, eyes are scrunched almost shut or open and angling down, cheeks and eyebrows are lower and the mouth points downwards.

http-_www.thefortuneinstitute.com_blog_wp-content_uploads_2010_08_great_smile.jpg

https://blogger.googleusercontent.com/img/b/R29vZ2xl/AVvXsEg7BRMfo7XbeQ3qDiJhM3ebFsGbjL4qVnDhNeNdmTYsa7vK9IE4b_VOKbtVqlVddBDc5I25WqPCAkvx36HW0knp0SmdCte5I-2DcJEu4CEKGg1AC0cYn2X865FpYvv2iRLiu7I-fGp7jRuU/s320/smile,black,,,white,child,freckles,b,w,beautiful-429c63c23f61ff7fe94a3d38dd69fbea_h.jpg

http://www.reviewburn.com/wp-content/uploads/Beautiful-Smile.jpg

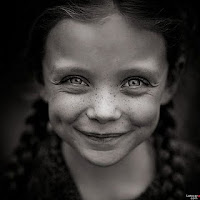
Happy - where one's eyes are longer and more of an almond shape, sort of squinting, the lips are stretched out and skinny, pointing upwards, the cheeks are higher, there are lines and or dimples around the mouth and the teeth are usually showing.

http://opensourcejokes.com/wp-content/uploads/2007/03/donkey_kid.jpg

http://esldivlabs.vcc.ca/ELSA/Instructor_Web_Exercises/Vocabulary/terrified.jpg

http://loistuzeneu.com/wp-content/uploads/2010/06/home-alone-fearful-face.png

Terrified - when one's brow furrows, eyes get bigger, eyebrows rise and the jaw drops and mouth opens as wide as humanely possible in a silent scream.
Read more

Emma Watson

In this image I used the spot healing brush to remove blemishes from Emma Watson's face. after this I liquified the image and used the bloat tool to enlarge her mouth and eyes, as well as the pinch tool to decrease the size of her nose and make it petite. When this was done i created a new layer of Emma' mouth and used a mask to paint it down t size. I then increased the saturation of this layer to give her nice pink lips. I also increased the saturation of the main layer to enhance the colours of the image and make her look bright, glowing, healthy and tanned, as shown in the image below:

http://images1.fanpop.com/images/photos/1300000/Hermione-Granger-Photoshoot-OOTP-hermione-granger-1354667-1919-2560.jpg
Read more

Johnny 'Coco' Depp - He always was quite nuts.

For a bit of fun, I decided to merge Johnny Depp with coconut.
http://www.showbizgossips.com/wp-content/uploads/2010/11/johnny-depp-pirates1.jpg

http://www.wildcrafted.com.au/Image/Coconut.JPG

As with the previous images, I created this one by first selecting, copying and pasting the coconut onto Johnny Depp's face, changing the opacity, and again using a mask to paint out the edges, as well as the eyes, eyebrows, mouth, nose, moustache, and goatee. I then used the colour replacement tool to change the colour of Johnny Depp's nose to match the colour of the coconut, creating Johnny 'Coco' Depp.
Read more

A Ron-aton

This image was created by merging a photo of Ron Weasley off Harry Potter and an Orang-utan.

http://images2.fanpop.com/images/photos/7300000/ron-weasley-rupert-grint-7321250-2100-1400.jpg

http://upload.wikimedia.org/wikipedia/commons/8/8a/Orangutan_01.jpg

This image was created much the same as the Emog, by selecting Ron's face, copying it and then pasting it onto the orang-utan. I then changed the opacity, added a mask and used a soft brush to paint out the parts I didn't want around the forehead and mouth area. after this I used the clone and spot healing brush to extend the orang-utan's fringe and cover up the second pair of eyes. After this I isolated the orang-utan and created a new layer in order to change the hue, saturation and brightness to a nice lovely PURPLE. I then did the same with Ron's face, changing it to a green that would compliment the purple colour to create my Ron-aton.

Read more

Emog


This image was created by merging a picture of an emu and a frog.


I created the Emog first by selecting and cutting the emu's head out of the image and pasting it onto the frog. After changing the opacity, using a mask, I painted out the edges of the emu so that it was inline with the frog. I did so using a soft brush to create a soft edge, and cut out the fur over the eye, as well as used the clone and spot healing brush to cover up the emu's eyes. I then changed the hue and saturation of the emu's head and fur to match the green of the frog's skin. After this I created another layer of the emu's beak, using a mask to paint out everything but the edge of the beak. I then adjusted the hue and saturation as well as brightness of this layer so that it was a nice orange colour that matched the frog to create an Emog.

Read more
 

Year 9 Creative Media Design by Insight © 2009